So enjoy... and continue to visit our blog for more projects and inspiration to help you as you plan your perfect day!
Materials:
- Downed wood (we chose Aspen since it is abundant in our neighborhood, and found a pile of downed trees just a few blocks away- it also happened to be the perfect size I was looking for)
- Chain Saw
- Dremmel with 1/4 inch straight router bit
- Ruler
- Pen
- Dark colored paint + Paint Brush
- Downed wood (we chose Aspen since it is abundant in our neighborhood, and found a pile of downed trees just a few blocks away- it also happened to be the perfect size I was looking for)
- Chain Saw
- Dremmel with 1/4 inch straight router bit
- Ruler
- Pen
- Dark colored paint + Paint Brush
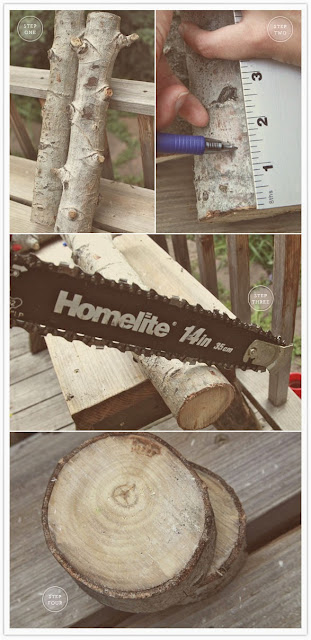
Step 1: Find your wood
Step 2: Use a pen and ruler to mark each increment where you want to make your cuts. You can decide how thick or thin you would like the wood to be, but we chose about 1 1/2 inches (this width enabled the numbers to stand alone or lean against something)
Step 3: Make your cuts. We found a chainsaw to be the most fast, effective way- but my cuts weren’t perfect. Please take care to adhere to proper chainsaw safety (proper eye protection is a must!)- I had my fiancee give me a lesson before we got started. (Note- wood will be grainy when cut with a chainsaw- I liked this look, but if you wanted something more refined you could add an extra step here with a power sander).
Step 4: Make sure you have enough wood rounds for each table.
Source: 100 Layer Cake (a very awesome blog, check them out!)
Xoxo,
Christina Pectol
ENVY EVENTS
M: 253.468.5586
W: envyeventsco.com
Like us on facebook! www.facebook.com/envyeventsco
Step 5: Once you have enough wood rounds for each table number, take a dark pencil or pen and make an outline of each number on the round for you to trace with the dremmel.
Step 6: Use dremmel to “drill into the wood” along the numbers you’ve traced
Step 7: Use brown paint and a skinny paintbrush to paint in indentations.
Step 6: Use dremmel to “drill into the wood” along the numbers you’ve traced
Step 7: Use brown paint and a skinny paintbrush to paint in indentations.


