Showing posts with label Centerpieces. Show all posts

1.19.2012

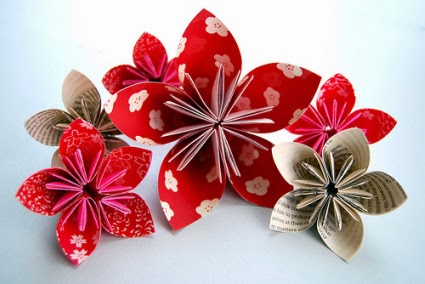
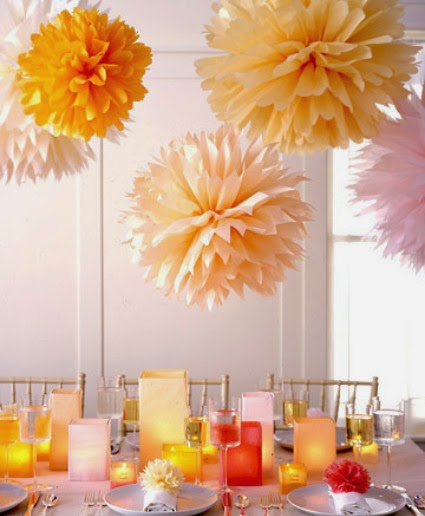
Floral Alternatives...Paper Bouquets & Decor, DUH!

Let's suppose you aren't a huge fan of flowers, since they will end up dead and withered away within a few days...aaaaand spending a couple thousand dollars on said flowers is totally NOT in your budget.
I now propose an eco-and-pocketbook-friendly alternative, and if you're a true DIY'er you won't mind the time involved in creating this wondrous project...PAPER BOUQUETS! (OR BROOCH BOUQUETS, whichever you prefer). I will be posting a tutorial on creating the latter within the next few days so stay tuned folks.
(Brooch bouquet)
Now, you have to admit that paper flowers are darn cute. This is also not to mention the fantastic effect they will have on your pocketbook. Most paper bouquets are constructed from pages out of old books, newspaper, magazine clippings, or you can find some fancy stock/scrapbooking paper from your local craft store. Use any pattern you want to create a nice addition to your wedding decor. Bold contrasts are my personal favorite.
And honestly, they don't lack any bit of "elegance" or "fancy" or whatever you want to call it. It's a handmade project, which in my opinion, will not only last longer, but create better memories during the creation process as well. And the absolute best part is, you're not limited to one type of flower.
For the Kusudama tutorial, click here.
For the Ocasiocasa tutorial, click here.
For the Dahlia tutorial, click here. 
There's also a bazillion different varieties of roses and other florals that you can make as well. Round roses, spray garden roses, etc.
Have fun with this project, and happy flower making!
XOXO-Christina

11.02.2011

Guest Book Alternative: Custom Skateboard Deck


Freakin awesome!! A refinished skateboard deck that has a picture of the couple (secured with resin), and room for their fam and friends to leave words of wisdom and ♥. In my opinion, this beats those boring old traditional guest books. HANDS DOWN. What a cool way to leave a memory of your special day hanging in your house. Let me know if you need some DIY instructions.

xoxo, Christina

8.05.2011

DIY Project - Wooden Table Numbers

As a savvy spender (aka cheap, price aware, whatever you want to call it), I'm always one lookout for DIY projects that will save my clients a few extra bucks. As we all know, the cost of hosting such an elaborate event (perhaps the most important and detailed event you will ever host, ever)....quickly rises. Anytime a vendor hears the word wedding - I'm pretty sure dollar signs start flashing before their eyes. As a firm believer in the fact that newlyweds should not start out their life of matrimony in debt, DIY projects are my fave. Why pay the extra cash when you have the tools and skills necessary to "do it yourself!"

So enjoy... and continue to visit our blog for more projects and inspiration to help you as you plan your perfect day!


Materials:
- Downed wood (we chose Aspen since it is abundant in our neighborhood, and found a pile of downed trees just a few blocks away- it also happened to be the perfect size I was looking for)
- Chain Saw
- Dremmel with 1/4 inch straight router bit
- Ruler
- Pen
- Dark colored paint + Paint Brush


Step 1: Find your wood
Step 2: Use a pen and ruler to mark each increment where you want to make your cuts. You can decide how thick or thin you would like the wood to be, but we chose about 1 1/2 inches (this width enabled the numbers to stand alone or lean against something)
Step 3: Make your cuts. We found a chainsaw to be the most fast, effective way- but my cuts weren’t perfect. Please take care to adhere to proper chainsaw safety (proper eye protection is a must!)- I had my fiancee give me a lesson before we got started. (Note- wood will be grainy when cut with a chainsaw- I liked this look, but if you wanted something more refined you could add an extra step here with a power sander).
Step 4: Make sure you have enough wood rounds for each table.


Source: 100 Layer Cake (a very  awesome blog, check them out!)
Xoxo,
Christina Pectol
ENVY EVENTS
M: 253.468.5586
W:
envyeventsco.com
Like us on facebook! www.facebook.com/envyeventsco

Step 5: Once you have enough wood rounds for each table number, take a dark pencil or pen and make an outline of each number on the round for you to trace with the dremmel.
Step 6: Use dremmel to “drill into the wood” along the numbers you’ve traced
Step 7: Use brown paint and a skinny paintbrush to paint in indentations.

7.30.2011

Envy Events Portfolio: Angela and Rob

Check out these beautiful photos from Rob and Angela's Wedding. Envy Events delightfully acted as the primary event coordinator - and supported the bride and groom from "Will you marry me" to "I DO". Angela needed help creating her DIY invites, finding the reception location, securing all of her vendors (photographer, bakery, musician, rentals, floral) - and Envy Events paved the way so Angela could stress a little less. :) The reception was held at the charming Pantages Theatre in Tacoma, WA.

Check out the entire gallery here.